Table of Contents
Blossom
 Blossom is my custom firmware for the Adafruit Memento programmable DIY camera that turns it into a serious toy camera! I love crusty old digicams (which is pretty obvious if you look at my photography), but pretty much all of the early, small, toy-like ones have zero manual controls or adjustments and disappointingly bad low-light performance. The Memento, being a modern and fully programmable camera, provided an opportunity to fix all these issues, so I wrote custom firmware for it that offers a variety of manual controls and adjustments while still taking wonderfully terrible toy-camera photos. Its features include:
- Auto and manual focus, plus a focus magnifier when manually focusing
- Auto and manual control over shutter speed and gain (ISO)
- Adjustments for exposure compensation, brightness, contrast, and saturation
- Live view with histogram, thirds grid, and artificial horizon
So what do its photos look like?
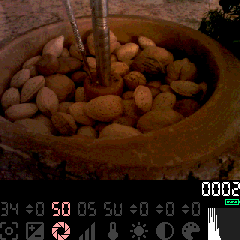
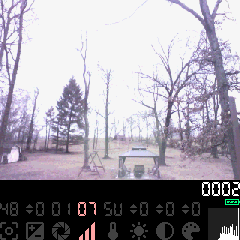
Blossom takes photos at the staggeringly high resolution of 320×240 at 12-bit color (4 bits per color channel). This means that its photos are tiny, crusty, and full of character! Here's a selection of photos I've taken with it:
Download and install
To use Blossom, you'll first need to buy a Memento from Adafruit, and you should also buy a battery too while you're at it. Then, you can download these files:
- Arduino source code (not needed to use Blossom, but it's here if you want to take a look!)
-
- Features a 17mm threaded lens mount, turning the Memento into an interchangeable-lens camera! Most smartphone lenses are compatible with this mount (such as the ones made by Neewer).
- Assembly requires eight M3x6mm screws (I recommend using button head cap screws)
To install Blossom onto your Memento camera:
- Plug the Memento into your computer and turn the power switch on. After it starts up, double-press the Reset button on top of the Memento. (The timing is pretty sensitive - if you don't get it the first time, try double-pressing a bit slower or faster.)
- The Memento will enter bootloader mode (the LCD should show “PyCamera”) and show up on your computer as a USB flash drive called “CAMERABOOT”.
- Download and unzip the blossom.uf2.zip file - there should be a
blossom.uf2file inside it. - Drag the
blossom.uf2file onto the CAMERABOOT drive, and once it's done copying, the Memento will boot up into the Blossom firmware.
That's it - you're now ready to use Blossom! This process can be repeated to install future Blossom updates or any other firmware.
Blossom user manual
Taking photos
First things first, you'll need to get a micro SD card for your Memento - this is where photos will be stored. The SD card will need to be FAT32 formatted. Blossom doesn't have the ability to format SD cards, so you'll need to do this on your computer first.
Once you have an SD card installed, you can just start pointing and shooting! When you're ready to take a photo, hold the camera very steady (there's no image stabilization) and press the Shutter button (the rightmost button along the top edge of the camera). The camera will make a click sound when it's taken the photo, then make another higher-pitched click when it's done saving the photo to the SD card and is ready to take another one. You can just point and shoot with Blossom if you want, but the real fun comes from playing around with the adjustments it provides - read on to learn more!
Buttons and controls
- Power switch: Slide to the right to turn the camera on, slide to the left to turn the camera off.
- Reset button: Press to reboot the camera. Double-press to enter bootloader mode.
- Shutter button: Press to take a photo and save it to the SD card.
- D-pad: Used to select and adjust parameters. Press left/right to choose a parameter to adjust, then press up/down to adjust the value of the selected parameter.
- Menu button: Presss to open or close the options menu.
- Micro SD card slot: Insert a FAT32-formatted micro SD card to store photos onto.
- USB-C port: Used to charge the camera's battery and to install firmware. An orange light near the USB port will light up while charging, then go out when charging is complete.
Viewfinder display
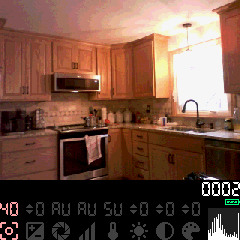 Blossom's viewfinder display shows what the camera is currently seeing, how many photos have been taken on the SD card, the current battery level, the values of all the parameters, and a histogram representing the brightness/exposure of the image.
Histogram
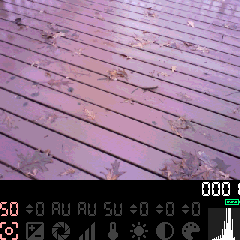
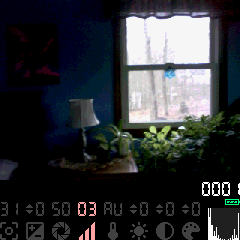
The histogram, shown in the bottom-right of the viewfinder, is a graph that displays the exposure and contrast of the image. The left side of the graph shows the amount of dark pixels in the image while the right side shows the amount of bright pixels. The very left and very right edges of the graph show the amount of totally black and totally white pixels. Here are some example photos to give you an idea of how to read the histogram:
Adjusting parameters
Blossom provides 8 different parameters that you can adjust, which are displayed along the bottom of the viewfinder. To choose a parameter to adjust, press Left or Right on the D-pad to scroll between them. The currently selected parameter is highlighted in sakura pink. To adjust the value of this parameter, press Up or Down on the D-pad. If the value of a parameter is shown as AU, that means that it's in auto mode and is being controlled by the camera. If you want to manually adjust a parameter that's currently in auto mode, just press Up or Down on the D-pad to set it to manual mode. Press the Auto button to set the currently selected parameter to auto mode (or reset the value to zero if it doesn't have an auto mode).
Blossom will remember the adjustments that you've made whenever the camera is powered off, so the next time you use the camera, all of the parameter values will be just the way you left them.
Parameter list
Focusing
Blossom supports both auto and manual focusing as described earlier in the parameter list. To adjust focus, press Left/Right to select the  focus parameter in the viewfinder display, then press Up to focus on farther subjects and Down to focus on closer subjects. A focus value of 0 is extremely close, while a focus value of 50 is “infinity” (for landscapes and distant subjects). When you adjust the focus manually, the viewfinder will zoom in on the center of the image for a couple seconds to give you a better view of what's in focus. Press Auto to have the camera focus automatically (the value will be displayed as
 AF while autofocus is in progress).
By default, Blossom will set its focus to infinity when powering on, then leave it up to you to auto or manually focus as necessary while using the camera. If you'd prefer to have the camera always autofocus before taking a photo, you can do so in the options menu.
Exposure
Exposure refers to how much light is collected by the camera sensor while a photo is being taken. It's your control over how bright or dark the photo turns out - if the camera can collect more light, the photo will be brighter, and if the camera isn't allowed to collect as much light, the photo will be darker. However, it's possible to collect too much light and overwhelm the camera sensor, leading to an overexposed photo with “blown-out” colors and details. On the other hand, if you don't collect enough light, the photo will end up underexposed and shadows and darker parts of the image will just become solid black. Blossom provides you with two controls for adjusting exposure: shutter speed and gain. You can have the camera adjust these automatically in order to get an even exposure (see the parameter list above), but some situations will require controlling these manually in order to get the exposure that you want.
 Shutter speed refers to the amount of time that the camera sensor is allowed to collect light while a photo is being taken. This is your primary control over how much light the camera can collect. A slower shutter speed means that the exposure will literally take a longer amount of time, which offers the camera more chance to collect light, but also allows for motion blur to occur. Anything in the shot that moves while the shutter is open will get blurred across its entire range of motion for the duration of the exposure. If you're shooting a stationary subject (or want to intentionally capture motion blur), you can use as slow of a shutter speed as you want in order to collect enough light for a good exposure. However, if you're shooting a moving subject (or just have shaky hands when holding the camera), you may need to use a faster shutter speed to cut down on motion blur and increase the gain instead to get enough light for a good exposure.
 Gain (usually called “ISO” on other cameras) refers to amplification applied to the image captured by the camera sensor during an exposure. Increasing the gain doesn't actually increase the amount of light collected (only shutter speed can control this), it just boosts the signal from the sensor, making it appear like more light was collected. Cranking up the gain to account for an underexposed image will have a detrimental effect on the image quality - any noise/interference that gets into the image signal will get amplified along with the actual image, resulting in a noisy or grainy photo, as well as reduced color saturation and accuracy. Don't ever feel guilty about needing to crank up the gain though! In many situations, it's just what you have to do to get the shot, and it's always better to end up with a noisy photo than no photo at all. (Plus, Blossom is such a crusty camera already that a bit of extra gain-induced crust probably won't even be noticeable!)
Getting the perfect exposure requires a balancing act between shutter speed and gain. Generally, you want to set the shutter speed as slow as possible in order to collect as much light as possible. If you need to mitigate motion blur, you can speed up the shutter speed as necessary, then increase the gain to compensate. In very dark situations, you might need to max out both of these parameters to capture anything at all.
In most situations, you can usually set one or both of these exposure parameters to auto and just let the camera figure out the correct exposure. That way you can focus on framing, composition, and just having fun. You still have control over the exposure even in auto mode though - if the auto exposure is making the photo look a bit too bright or dark, you can use the  exposure level parameter to tell the camera to decrease or increase its exposure. Personally, I usually keep exposure level set to -1 or -2 to prevent bright areas of the image from getting totally blown out.
Options menu
Blossom contains a few more adjustments which can be accessed by pressing the Menu button. In the options menu, press Up/Down on the D-pad to scroll between options and Left/Right to toggle the currently selected option on or off. To exit the options menu and return to the viewfinder, press the Menu, Auto, or Shutter button. The options that can be toggled are:
- Shutter AF: When enabled, the camera will always autofocus before taking a photo when the shutter button is pressed. This will slow down photo-taking, but ensure that the photo will be in focus.
- Thirds Grid: Displays a rule-of-thirds grid over the viewfinder to assist you with composing your shot.
- Horizon: Displays a horizon line in the center of the viewfinder to assist you with holding the camera level. The horizon line will turn green when the camera is level.
- Beep: When enabled, the camera will play beep sounds when taking photos and when a fault occurs. When disabled, the camera is totally silent.
Fault messages
If there's an issue with the camera that's preventing it from taking photos, it'll make a sad beep sound and display a fault message along the bottom of the viewfinder display:
| Message | Description |
|---|---|
| SD Card Not Inserted | There's no SD card inserted in the camera, silly! It needs somewhere to save its photos. Insert an SD card, and try again. |
| Filesystem Incompatible | The filesystem on the SD card is not compatible with Blossom. Make sure it's formatted as FAT32. NTFS, exFAT, or APFS won't work! |
| Too Many Files | The SD card contains over 9999 photos - impressive! You'll need to delete some to make room for more photos. |
| SD Card Fault | Something's wrong with the SD card - try removing it and reinserting it. If that doesn't work, check if it's readable on your computer and try reformatting it. |
| Save Failed | The captured photo could not be saved to the SD card. Remove and re-insert the SD card, then try taking the photo again. If the issue persists, there may be a problem with your SD card - try reformatting it. |
| PNG Encode Failed | The captured photo could not be converted to a PNG file, so it wasn't saved. Could just be caused by a firmware bug or something? Try taking the photo again. |
| I/O Expander Fault | The Memento's hardware (I/O expander chip, accelerometer, camera sensor, or focus motor) has developed a fault and cannot operate, sorry :( |
| Accelerometer Fault | |
| Camera Sensor Fault | |
| Autofocus Fault |


